
가장 기초인 fillStyle과 fillRect에 대해서 살펴보자.
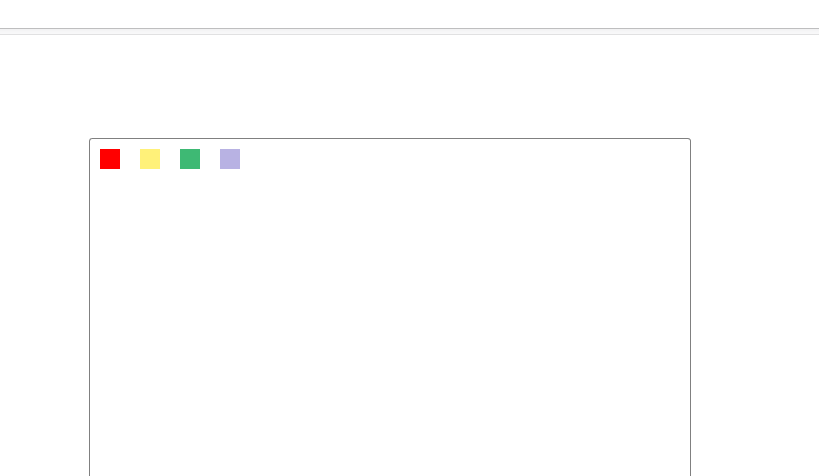
1. fillStyle
- 윤곽선과 채움 색의 초기 설정값은 검은색이다.
- fillStyle을 사용하면 다양한 색을 채울 수 있다.
<!DOCTYPE HTML PUBLIC "-//W3C//DTD HTML 4.0 Transitional//EN">
<html>
<head>
<title>Canvas</title>
    <meta http-equiv="Content-Type" content="text/html; charset=utf-8">
</head>
<style>
    body{padding: 5%;text-align: center;}
    canvas{border: 1px solid gray;border-radius: 3px;}
</style>
<body>
    <canvas width='600' height='600' id='canvas' ></canvas>
</body>
</html>

<script>
    const canvas = document.getElementById('canvas');
    const ctx = canvas.getContext('2d');
    const colors = ['red', '#fff179', 'rgb(62,185,116)', 'rgba(78,62,185,0.4)' ];

    ctx.fillStyle = colors[0];
    ctx.fillRect(10, 10, 20, 20);

    ctx.fillStyle = colors[1];
    ctx.fillRect(50, 10, 20, 20);

    ctx.fillStyle = colors[2];
    ctx.fillRect(90, 10, 20, 20);

    ctx.fillStyle = colors[3];
    ctx.fillRect(130, 10, 20, 20);
</script>
2. fillRect
- 사각형을 그리는 함수(x좌표, y좌표, 넓이, 높이)
- fill()함수와 stroke() 함수에 영향을 받지 않는다. -> 나중에 설명
- 함수의 자체에서 경로의 시작과 종료가 실행이 된다. -> 나중에 설명
음..첫번째는 뭔말인지 알겠는데 2번째와 3번째의 내용이 어렵다.
이를 이해하려면 다른 도형도 그려보면 쉽게 이해가 된다.
잠깐 원을 그려보도록 하자.
<!DOCTYPE HTML PUBLIC "-//W3C//DTD HTML 4.0 Transitional//EN">
<html>
<head>
<title>Canvas</title>
    <meta http-equiv="Content-Type" content="text/html; charset=utf-8">
</head>
<style>
    body{padding: 5%;text-align: center;}
    canvas{border: 1px solid gray;border-radius: 3px;}
</style>
<body>
    <canvas width='600' height='600' id='canvas' ></canvas>
</body>
</html>

<script>
    const canvas = document.getElementById('canvas');
    const ctx = canvas.getContext('2d');

    //사각형 그리기
    ctx.fillStyle = 'red';
    ctx.fillRect(10, 10, 30, 30);


    //1번원 그리기
    ctx.strokeStyle = 'green';
    ctx.fillStyle = 'green';
    ctx.arc(60, 130, 30, 0, Math.PI * 2, true);
    ctx.stroke();
    ctx.fill();

    /*
    ctx.strokeStyle = 'blue';
    ctx.fillStyle = 'blue';
    ctx.arc(160, 130, 30, 0, Math.PI * 2, true);
    ctx.stroke();
    ctx.fill();
    */
</script>
위 소스코드를 실행하면 아래 사진과 같은 결과가 나온다.
일단 arc라는 함수는 원을 그리는 함수로만 이해하자.
stroke는 선을 그려주는 함수며 strokeStyle은 선 색깔이며 fill은 채우는 함수이다.
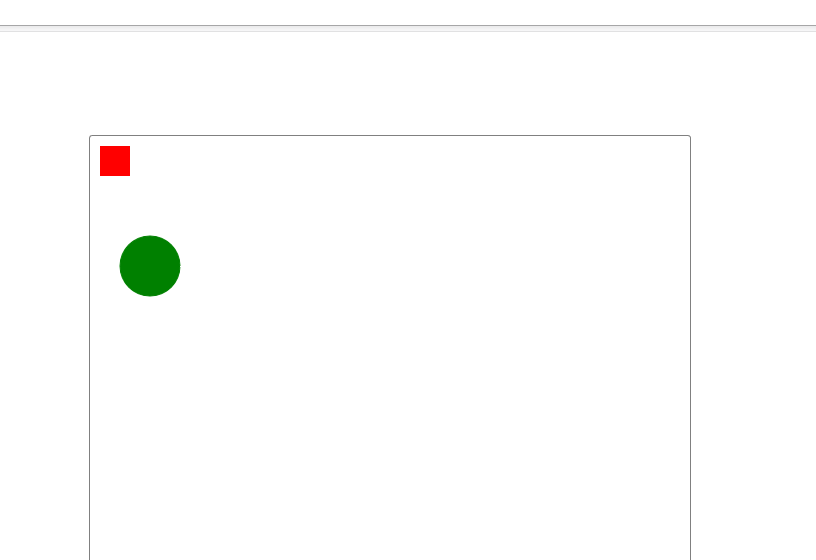
이제 맨 아래의 주석을 풀고 한번 실행하여보자.

사각형을 그릴때는 요런 현상이 없었는데..원은 요상하게 되어버렸다.
이를 해결하려면 아래처럼 코드를 수정해야 된다.
<!DOCTYPE HTML PUBLIC "-//W3C//DTD HTML 4.0 Transitional//EN">
<html>
<head>
<title>Canvas</title>
    <meta http-equiv="Content-Type" content="text/html; charset=utf-8">
</head>
<style>
    body{padding: 5%;text-align: center;}
    canvas{border: 1px solid gray;border-radius: 3px;}
</style>
<body>
    <canvas width='600' height='600' id='canvas' ></canvas>
</body>
</html>

<script>
    const canvas = document.getElementById('canvas');
    const ctx = canvas.getContext('2d');

    //사각형 그리기
    ctx.fillStyle = 'red';
    ctx.fillRect(10, 10, 30, 30);


    //1번원 그리기
    ctx.beginPath();  //그리기의 시작을 알림.
    ctx.strokeStyle = 'green';
    ctx.fillStyle = 'green';
    ctx.arc(60, 130, 30, 0, Math.PI * 2, true);
    ctx.stroke();
    ctx.fill();
    ctx.closePath();  //종료를 알림.

    //2번원 그리기
    ctx.beginPath();  //다른 그리기를 위해 시작을 다시 알림
    ctx.strokeStyle = 'blue';
    ctx.fillStyle = 'blue';
    ctx.arc(160, 130, 30, 0, Math.PI * 2, true);
    ctx.stroke();
    ctx.fill();
    ctx.closePath();  //종료를 알림.

</script>
beginPath와 closePath를 호출하여 그림이 그려지는 시작과 종료를 알려주었더니 아래 사진처럼 그림이 잘 나왔다.
캔버스에서의 그림을 그리고 시작할 때 beginPath를 따로 선언하지 않으면 계속해서 그리는 것으로 간주한다.
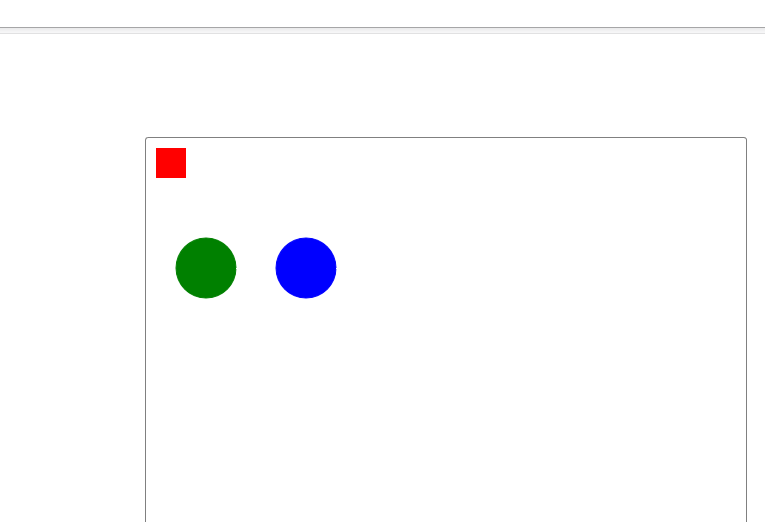
그런데 이 fillRect는 알아서 beginPath와 closePath 효과를 나타내 버리기 때문에 굳이 호출을 하지 않아도 개별적인 모양이 그려진다.
<!DOCTYPE HTML PUBLIC "-//W3C//DTD HTML 4.0 Transitional//EN">
<html>
<head>
<title>Canvas</title>
    <meta http-equiv="Content-Type" content="text/html; charset=utf-8">
</head>
<style>
    body{padding: 5%;text-align: center;}
    canvas{border: 1px solid gray;border-radius: 3px;}
</style>
<body>
    <canvas width='600' height='600' id='canvas' ></canvas>
</body>
</html>

<script>
    const canvas = document.getElementById('canvas');
    const ctx = canvas.getContext('2d');

    //1번 사각형 그리기
    ctx.fillStyle = 'red';
    ctx.fillRect(10, 10, 30, 30);

    //2번 사각형 그리기
    ctx.fillStyle = 'blue';
    ctx.fillRect(50, 10, 30, 30);

    //3번 사각형 그리기
    ctx.fillStyle = 'green';
    ctx.fillRect(90, 10, 30, 30);


    //1번원 그리기
    ctx.beginPath();
    ctx.strokeStyle = 'green';
    ctx.fillStyle = 'green';
    ctx.arc(60, 130, 30, 0, Math.PI * 2, true);
    ctx.stroke();
    ctx.fill();
    ctx.closePath();

    //2번원 그리기
    ctx.beginPath();
    ctx.strokeStyle = 'blue';
    ctx.fillStyle = 'blue';
    ctx.arc(160, 130, 30, 0, Math.PI * 2, true);
    ctx.stroke();
    ctx.fill();
    ctx.closePath();

</script>
따로 beginPath와 closePath를 하지 않았는데 구분되어 잘 나타남을 볼 수 있다.
또한 fill이나 stroke 함수를 아무리 호출하여도 fillRect(사각형 그리기)에는 아무런 영향을 미치지 않는다.

* 정리하여보자!
1. fillStyle
1) 윤곽선과 채움 색의 초기 설정값은 검은색이다.
2) html에서 사용되는 여러 색상 코드를 다양하게 사용 할 수 있다. (rgba까지도)
3) 영역의 색상을 채우는 데 사용된다.
2. fillRect
1) 사각형을 그리는 함수(x좌표, y좌표, 넓이, 높이)이다.
2) fill()함수와 stroke() 함수에 영향을 받지 않는다. 아무리 fill과 stroke을 호출하더라도 아무짓(?) 안한다.
3) 함수의 자체에서 경로의 시작과 종료가 실행이 된다. 선, 원 그리기 등 과 조금 다른 개념이다.
다음번에는 x좌표와 y좌표의 이해를 위한 선 그리기에 대해서 살펴보자.
'Html 캔버스 > Html 캔버스 튜토리얼 (내가만든 차트!)' 카테고리의 다른 글
| Html Canvas (Html 캔버스) 튜토리얼 (차트만들기!) - 6 : 이미지 그리기 (0) | 2020.02.03 |
|---|---|
| Html Canvas (Html 캔버스) 튜토리얼 (차트만들기!) - 5 : 좌표 (0) | 2020.01.31 |
| Html Canvas (Html 캔버스) 튜토리얼 (차트만들기!) - 4 : 선 그리기2 (0) | 2020.01.31 |
| Html Canvas (Html 캔버스) 튜토리얼 (차트만들기!) - 3 : 선 그리기1 (0) | 2020.01.30 |
| Html Canvas (Html 캔버스) 튜토리얼 (차트만들기!) - 1 : 소개 (0) | 2020.01.30 |


댓글