
로깅은 모든 어플리케이션의 필수기능 입니다.
슈퍼천재가 아닌이상 모든 프로그램에는 버그(bug)가 존재하고 해당 버그의 원인과 이유를 찾기 위해서는 기록을(log) 남겨야 하기 때문 입니다.
nestjs에서는 기본적으로 로그와 관련된 기능이 존재 합니다.
* 파일이름 : app.controller.ts
import { Controller } from '@nestjs/common';
import { Logger } from '@nestjs/common';

@Controller()
export class AppController {
    private readonly log = new Logger(AppController.name);

    constructor(){
        this.log.error('오류발생했습니다.로그동작해라');
    }
}
컨트롤러에서 간단하게 사용한 로깅관련 기능 입니다.
로거 클래스는 common패키지에 존재하며 warn, debug, error, info 등 다양한 출력을 통하여 로그를 기록 할 수 있습니다.
또한 메인파일에서 로그레벨을 지정해 줄 수 있습니다.
* 파일이름 : main.ts
import { NestFactory } from '@nestjs/core';
import { NestExpressApplication } from '@nestjs/platform-express';
import { AppModule } from './app.module';
import { LogLevel } from '@nestjs/common';


async function bootstrap() {
  let error : LogLevel = 'error',worn : LogLevel = 'warn',  debug : LogLevel = 'debug';
  const app =  await NestFactory.create<NestExpressApplication>(AppModule,{logger : [error, worn, debug]});
  await app.listen(3000);
}
bootstrap();
로그레벨을 설정하여 개발간, 배포간 로깅레벨을 지정 해 줄수 있 을 것 입니다.
그러나 이러한 방법은 로그를 단순하게 출력(print) 하는 것 일뿐 저장하지는 않습니다.
커멘드콘솔을 매번 사용자가 보고 있을수는 없기 때 문에 파일로 저장을 해야 합니다.
또한 다양한 날짜 포맷이나 데이터 형식도 지정하고 싶을 것 입니다.
이를 위해서 익스프레스부터 널리(?) 사용되어온 윈스톤(winston)을 사용 합니다.
역시나 라이브러리 설치부터 진행하여 줍니다.
npm install nest-winston winston
기본적인 사용법은 아래와 같습니다.
앱 모듈에 윈스턴 모듈을 추가해 주고, 사용하고자 하는 클래스에서는 의존성을 주입받아 사용하면 됩니다.
먼저 모듈에서의 간단한 설정을 살펴보겠습니다.
* 파일이름 : app.module.ts
import { Module } from '@nestjs/common';
import { AppController } from './app.controller';
import { AppService } from './app.service';
import { WinstonModule, utilities } from 'nest-winston';
import * as winston from 'winston';
import * as moment from 'moment';  //npm install moment

//silly=0(lowest), debug=1, verbose=2, info=3, warn=4, error=5(highest)
const level값 = process.env.NODE_ENV === 'production' ? 'error' : 'silly';
const format값 = winston.format.combine(
  winston.format.timestamp(),
  utilities.format.nestLike('앞에붙는명칭', { prettyPrint: true }),
);

@Module({
  imports: [
    WinstonModule.forRoot({
      transports: [
        new winston.transports.Console({  //콘솔출력 지정
          level: level값,
          format: format값,
        }),
        new winston.transports.File({  //파일저장 지정
          dirname: `./${moment(new Date()).format('YYYY-MM-DD')}`,
          filename: 'history.log',
          level: level값,
          format: format값,
        }),
      ],
    }),
  ],
  controllers: [AppController],
  providers: [AppService],
})
export class AppModule {
  constructor() {}
}
상당히 직관적인 코드 입니다.
윈스턴에서 사용되는 로그 레벨은 기본적으로 정보(info) 입니다.
아래는 로그레벨과 관련된 값(enum) 입니다.
silly=0(lowest), debug=1, verbose=2, info=3, warn=4, error=5(highest)
그러므로 로그레벨을 따로 설정하지 않으면 silly, debug, verbose 함수로 출력한 내용은 화면에 표시되지 않습니다.
이를 변경하기 위해서는 콘솔클래스(ConsoleTransportInstance)를 만들어 옵션에 원하는 로그레벨을 정해주면 됩니다.
//silly=0(lowest), debug=1, verbose=2, info=3, warn=4, error=5(highest)
WinstonModule.forRoot({
    transports : [
        new winston.transports.Console({ level : '원하는로그레벨' })
    ]
})
다음으로 포맷 입니다.
포멧은 combine이라는 함수를 통해서 여러 형식을 붙여줄 수 있습니다.
const format값 = winston.format.combine(
    winston.format.timestamp(),  //앞자리는 숫자형식으로
    utilities.format.nestLike('앞에붙는명칭', { prettyPrint: true }),  //맨앞이름, 이쁘게(?)
);


WinstonModule.forRoot({
    transports : [
        new winston.transports.Console({ level : '원하는로그레벨' }),
        format: format값
    ]
})
이제 파일저장 관련된 기능 입니다.
파일 저장은 File 이라는 클래스(FileTransportInstance 인터페이스)를 사용 합니다.
import * as winston from 'winston';

WinstonModule.forRoot({
    transports : [
        new winston.transports.File({
            dirname: '원하는 파일 디렉토리',
            filename: '원하는파일이름',
            level: '원하는레벨',
            format: '원하는포맷형식',
        }),
    ]
})
형식이 거의 기존의 콘솔을 지정해줄 때와 비슷하기 때 문에 어렵지가 않습니다.
위 내용을 전부 종합한 뒤에 이제 사용하고자 하는 클래스에서 의존성을 받아 주도록 합니다.
* 파일이름 : app.controller.ts
import { Request, Response } from 'express';
import { Controller, All,   Res, Req, HttpStatus, Inject } from '@nestjs/common';
import { Logger } from '@nestjs/common';
import { WINSTON_MODULE_PROVIDER } from 'nest-winston';
import { Logger as WisLog } from 'winston';


@Controller()
export class AppController {

  private readonly log = new Logger(AppController.name);

  constructor(@Inject(WINSTON_MODULE_PROVIDER) private readonly log2: WisLog){

    this.log.debug('default log','asdf');
    this.log.error('default log', {asdf:1234,text:'asdfasdf'});
    console.log('---');
    this.log2.debug('debug','일반문자열');
    this.log2.error('error',{asdf:1234,text:'asdfasdf'});

  }

  @All('/')
  default(@Req() req: Request, @Res() res: Response){
    res.status(HttpStatus.OK).send({ result : 1234 });
  }

}
컨트롤러에 기능을 붙여 보았습니다.
Inject 데코레이터를 활용하여 윈스턴 로그 객체를 주입 받았으며, 사용법은 "이름, 내용" 으로 표기를 합니다.
실제 실행하여본 모습 입니다.
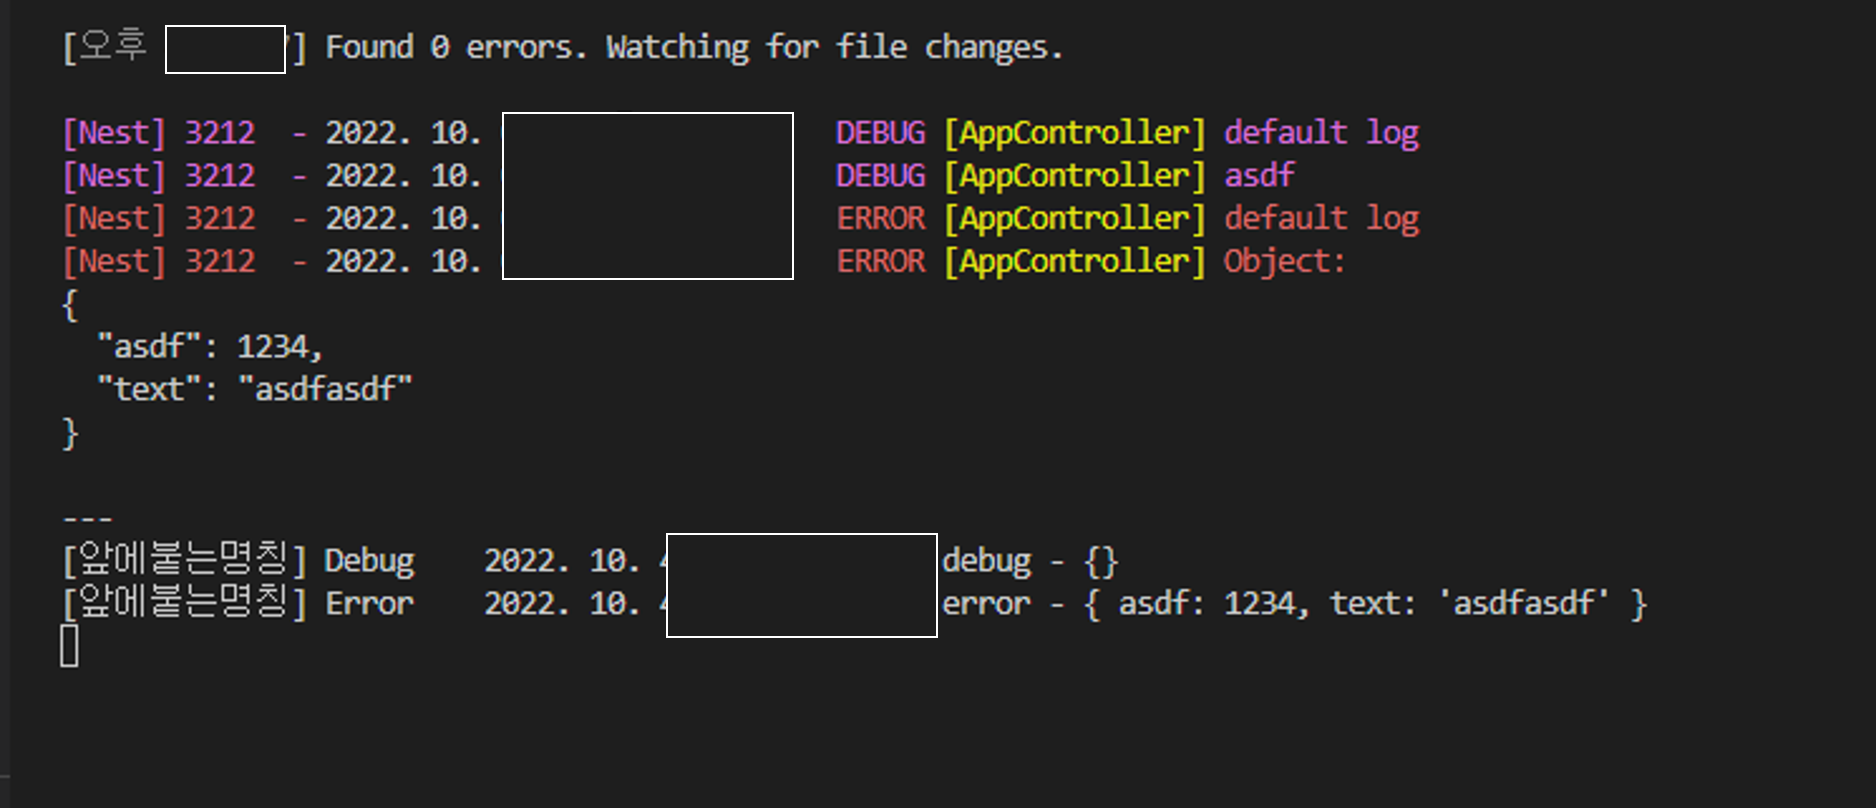
이제 파일이 저장되었는지 디렉토리를 살펴 봅니다.
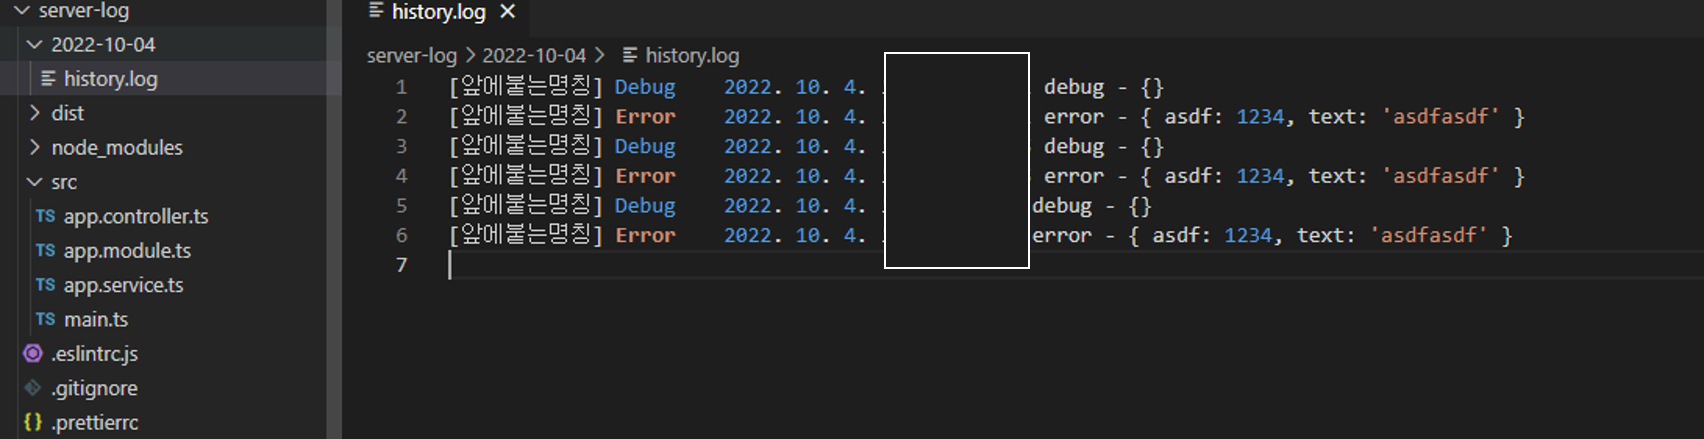
nestjs에서 로깅 설정은 비교적 쉽습니다.
심지어 설정을 통해 winston을 아에 기본로깅 클래스로 대체할 수도 있습니다.
https://www.npmjs.com/package/nest-winston
nest-winston
A Nest module wrapper for winston. Latest version: 1.7.0, last published: 3 months ago. Start using nest-winston in your project by running `npm i nest-winston`. There are 141 other projects in the npm registry using nest-winston.
www.npmjs.com
위 내용에 사용된 코드는 아래 제 깃허브에서 받아볼 수 있습니다.
https://github.com/TaeSeungRyu/NestProject/tree/main/step15
GitHub - TaeSeungRyu/NestProject: Nestjs 프로젝트
Nestjs 프로젝트. Contribute to TaeSeungRyu/NestProject development by creating an account on GitHub.
github.com
공부하면 할 수록 재미있고 즐거운 nestjs!!!
궁금한점 또는 틀린부분은 언제든 연락 주세요!
'Node.js > Nestjs (Nest.js)' 카테고리의 다른 글
| Nestjs 프레임워크 서버(일반 웹소켓 사용하기, websocket, socket.io 말고) (2) | 2023.05.25 |
|---|---|
| Nestjs 프레임워크 서버(microservices, mqtt) -17 (2) | 2022.10.11 |
| Nestjs 프레임워크 서버(emitter, rxjs, schedule) -15 (0) | 2022.09.22 |
| Nestjs 프레임워크 서버(Mongodb, database) -14 (0) | 2022.09.16 |
| Nestjs 프레임워크 서버(sequelize, database) -13 (1) | 2022.09.11 |


댓글